


IoTBue Workshop – Getting closer to a real IoT device
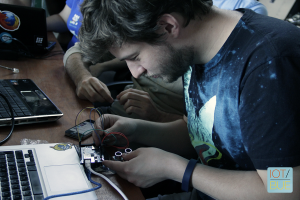
Recently the Buenos Aires Internet of Things (IoTBue) Meetup held a workshop to train developers on IoT development from scratch. This workshop was hosted by developers from R/GA, Patagonia Technology and Cran.io.
The goal was simple: build a Nest thermostat clone in 6 hours. We split the exercise into 3 phases. We established communications with the sensors, then added a simple temperature visualization, and then finally improved the sensor’s intelligence.
Phase 1 – Hello Arduino.
In this phase we explained how Arduino works and established a connection from a laptop to the Arduino using an Ultrasonic sensor. We then used a DTH11 sensor to measure weather conditions like humidity, pressure, and temperature.
Phase 2- Live Dashboard.
Confident that the Arduino was working, we embarked on sending information to a server. We used an Arduino Ethernet Shield to transmit data to a REST service that was hosted on Node.JS.
From there, we saved the information to a Mongodb instance using Mongoose and broadcast the updates to a frontend console using Socket.io. The front end also drew simple status graphics using d3.js. We used the Google Starter Kit as main CSS bootstrap. Quick and dirty but effective.
Phase 3- Add Intelligence.
Prediction based on data accumulation is the key to a smart IoT system. In order to demonstrate this we introduced everyone in the room to the theory of control systems by creating a control loop between the sensors, actioners, and measuring system. The goal was to affect the system conditions actioning a “lamp” to increase temperature or a ventilator to reduce it.
For that we used a really simple but powerful formula to control when to use the activators
var dt = tint- tdest;

var dext = tempNext - tempNow;

var dint = dt + dext;
where:
- tint is the Current Internal Temperature from System.
- tdest is the Deseable Internal temperature setted by the user.
- tempNow is the Current Internal Temperature using Weather API.
- tempNext is the Upcoming Outside Temperature using Weather API.
One way of using this will be something like this:
var status = '';

if(dint>1.0){

status='COLD';

}

else if(dint<-1.0){

status='WARM';

}

else{

status='OFF';

}
This algorithm allows us to change the temperature of the environment smoothly. If the system needs to warm (dint <-1), we turn on a light. If system needs to get cool down (dint >1), we try the ventilator. Otherwise, we do nothing.
Of course, this example doesn’t account for humidity or pressure, but these simplifications helped a convey the core concepts. From here one could add additional constraints and control loops to improve upon the core.
The source code for NestRemix is available here: https://github.com/IotBue/nestRemix
A live example of the platform is online at http://nest-remix.herokuapp.com/dashboard/arduino20
With this 3 phases we made created a solid foundation for future IoT projects using off the shelf components and a few clever tricks.